
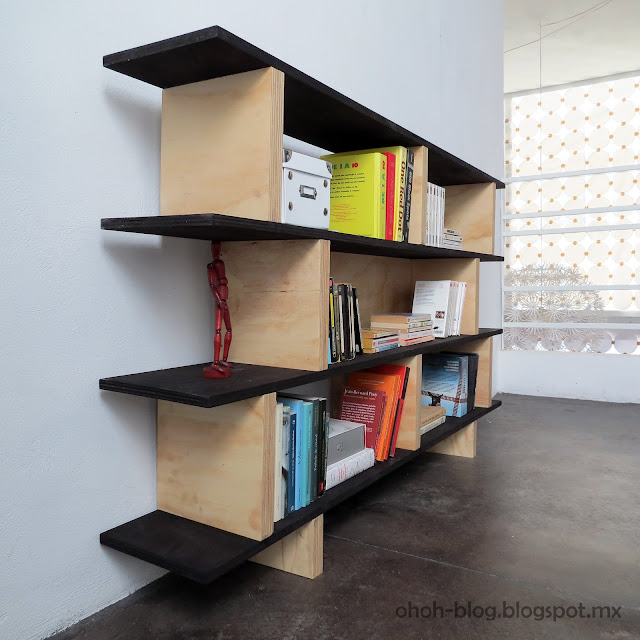
Most of theboxescontainbooks andcomics,soa librarywas needed! I've always lovedthis Bookcasecreated byCharlottePerriand, so I took some inspiration of it. The originalisbetter, but don't fit in my budget!
Hace5 años quenos mudamos desdeBélgica hasta México,y aún haycajassin abrir! Buenofue mas fácilcuando nos cambiamosde casahace dos años,peroha llegado el momentode resolver elproblema!
La mayoría de lascajas contienenlibrosy cómics, por lo que se necesitaba unabiblioteca!Siempre me ha gustadoestabiblioteca creadapor CharlottePerriand, entonces la tomé como inspiration. El originales mejor,pero no cabe en mipresupuesto!

I didcut theplywoodboardswith a carpenter,on the followingdimensions:
Shelves:
A/ 16 pieces of 10" x 10"
B/ 4 pieces of 10" x 63"
Back:
C/ 1 piece of 10" x 36.5"
Base:
D/ 4 pieces of 5 "x 10"
E/ 1 piece of 5" x 36.5"
Hicecortar los paneles de triplayconun carpintero, con las siguientes dimensiones:
Repisas:
A/ 16 piezas de 25 cm x 25 cm
B/ 4 piezas de 25 cm x 160 cm
Fondo:
C/ 1 pieza de 25 cm x 93 cm
Base:
D/ 4 piezas de 12 cm x 25 cm
E/ 1 pieza de 12cm x 93 cm
A smallsketchto make it clear:

I did the same with the D pieces to make the base.
I sandedall the pieces, flat and edges (booooringpart). Istainedshelves in chocolate color andapplied transparentvarnishon the otherpieces. I like the contrast between the two colors, this can work with any other colors combinations, give a try.
Elprimer paso consistió enpegarde dos endoslaspiezas"A", para hacer las partes verticales.
He utilizadopegamento para madera yabrazaderas para sujetar las juntas el tiempoque se seque el pegamento.
Hice lo mismo con las piezas D para hace la base.
Lijétodas las piezas, bordes y planos (aburriiiiiiiiido). He teñidolos estantes color chocolate y apliqué un barniztransparentesobre las otras piezas.

ArmélaspartesDy Epara hacer la basedelabiblioteca. Tiene queponer las piezasD perpendiculara la pieza E,poner un poco depegamentoentrelas piezasy luegofijar con dostornillos en cada lado.
 Then I did the same with the C piece and two A pieces (after gluing them 2 by 2) to make the back of the bookcase.
 Luego hicelo mismo con lapieza C y de dos piezasA (después de pegarlas2por 2)para hacer laparte de atrás dellibrero.

Después, ensamblé trespiezas A con unestanteB. Pusepegamentoen el estantey coloque lapieza A encima,fijense que seanverticales. Lo hicedos veces.

Ya casi terminamos, podemos empezar aarmarla partes,colocarla base en elpiso, poner un poco de pegamentoy poner unestanteen la parte superior. Utilice abrazaderaso pesos(libros o caja de heramientas) para presionar y tener una buena adherencia.A continuación, agregue pegamento ycolocar laotra repisa en laparte superior, yasí sucesivamente ....Hasta elúltimoestante!
Espero que les gusta, y que las explicaciones las ayudaran a realisar uno! Preguntan me si les queda duda!

